


Stone countertops mainly include: granite countertops, marble countertops, sandstone countertops, slate countertops, limestone countertops and quartz countertops, among which the mainstream is granite and marble countertops, and granite countertops are the most extensive in terms of production quantity and application range.
Stone Countertop Production
The Main Producing Process of Stone Countertop:
Material selection→ Slicing→ Polishing→ Cutting → Edging→ Milling&Drilling→ Repairing&Polishing → Try-out test→ packaging → completed
- Material selection
According to the customer's sample or production order requirements, select the appropriate block rough, it is best to knock a block sample for polishing control, and observe whether the pattern, color and grain are consistent. If it is a countertop of regular thickness, you can also go to the slab market to purchase slabs directly.
The point of attention in the selection of materials is to choose blocks or large slabs with the same color, the same pattern, the same particles, and close to density, and at the same time, the appearance is not allowed to have cracks, stone galls, color lines, sweeps and other defects. At the same time, the thickness and size of the large slab should be paid attention to.

- Slicing
It is the process of cutting blocks into wool boards with disc saws or sand saws according to the processing requirements of customers. After cutting, an inspection should be carried out first, and the qualified wool board should be retained, and the unqualified wool board should be removed, and the ultra-thick wool board should be post-processed. (If you're purchasing a large board, you can skip this stage.)

- Polishing
The polishing stage is divided into two parts: Rough Polishing and fine Polishing.
Rough Polishing:
The products that are qualified in the previous process and the rough plate that have been fixed are coarsely ground with a grinding machine, and the current grinding machine is mainly a walk-behind mill and a multi-head continuous grinding and polishing machine. After waiting for the wool board to dry, check the board surface, the plate surface effect is good, you can directly carry out fine grinding, if you find that the quality of the hair board is not ideal, you can brush the surface of the hair board, brush a layer of resin glue on the hair board and the small holes and small cracks, chicken claw patterns and other defects on the hair board, and at the same time can also make the board surface of the hair board better, the gloss is higher.
In good weather, the resin can generally dry in more than half an hour, and if the weather is bad, it will take about 1-2 hours to dry, and it is best to wait until it is dry before fine grinding. There are also factories that are not coarsely grinding, wash and inspect the wool board, and then directly on the wool board, if there is a problem, brush the glue. Usually granite is brushed less, and marble is brushed more.
Fine Polishing:
Use a grinding machine to polish the qualified wool board or the repaired wool board one by one into a wool plate, remember to use red crayons to mark the cracks, light color, stone gall, sweeping flowers and other defects in the wool board that cannot be repaired, so that the next process can be found in time, and these defects can be avoided to process small size components, such as water baffles or thickened edges, etc.
Usually the gloss of European and American orders is required to reach more than 90°, or according to the customer's requirements for processing, if some of the stone does not meet the requirements to negotiate with the customer. AT THE SAME TIME, THE FLATNESS LIMIT TOLERANCE OF THE EUROPEAN AND AMERICAN STANDARD WOOL LIGHT BOARD IS 0.8MM, AND THE ALLOWABLE TOLERANCE VALUE OF THE THICKNESS LIMIT TOLERANCE IS PLUS OR MINUS 1MM.

- Cutting
The front qualified wool plate is discharged and cut according to the requirements of the production order, and all parts of the table top are cut --- main table, backbaffle, side baffle and front baffle, etc. When cutting, it is necessary to check the surface before cutting, pay attention to the stone defects marked before, avoid cracks, black spots, color lines, color spots, sweeping, etc., and do not have yin and yang sides.
At the same time, it is necessary to ensure that the geometric size, angle size and diagonal size of the cut finished product are accurate, and no chipping and corner dropping are allowed. If the back of the countertop needs to be bonded, it is also necessary to ensure that the edges, edges and corners of the back are intact and undamaged, so as to facilitate the subsequent edge processing.

- Edging
Edge processing is to process the edge of the countertop to see it as a simple straight edge or processed into a special-shaped edge (cow nose edge, duck beak edge, etc.). If the customer does not require the edge to be thickened, the table top can be directly processed (car edge), if the customer is required to thicken the edge, then the edge of the table top should be thickened first.
The specific method is to have a small cutter to grind the thickening place, and then the bonding surface is roughed into a rough surface, so as to bond more firmly, and then it is glued and bonded, and finally clamped firmly with a clamp. Pay attention to the gap between the two plates on the adhesive surface when bonding, the better it is, preferably to reach 0.1~ 0.2mm. After the glue dries, you can carry out edge processing, advanced factories are assisted by special copy edging machines and manual polishing, and general factories are used for manual cutting.

- Milling&Drilling
It is to open the installation holes of the basin opening, faucet holes and undercounter basins on the countertop. The opening is generally opened by the machine, and the basin is usually opened manually, or the four corners of the wash basin are opened by the empty machine first, and then cut by hand.

- Repairing&Polishing
Repair is to repair the damage, slight unevenness or missing corners caused by careless processing, or other natural defects, pay attention to the use of glue close to the color of the stone to repair.
Polishing is the polishing of the glossy surface of the entire countertop, the same gloss after polishing is required to be more than 90 °, at the same time, the surface is mirror luster, no concave and convex feeling, no wave lines, the straightness of the junction is kept in a straight line, and the gloss of the countertop edge and the washbasin mouth should also be consistent with the sky. It is usually ground with a walk-behind mill, and if the effect is good, a large mill can be used.
For the countertop that is a combination of multiple parts, it is necessary to assemble, repair and polish it to avoid problems when it is tried to be assembled.

- Try-out test
The countertop is inspected block by piece, and the unqualified products are replaced or reworked in time. At the same time, for the combination table that is not a single product, in addition to the smoothness of the edge, the feel and the flatness of the plate, etc., it is also necessary to try to put it together, pay attention to the unity of the color between the combination table, the degree of integration of the interface, and the left and right order of the combination, which must be accurate in accordance with the drawings.
For the combination effect is not good, it should be reworked, and the color is not uniform to be replaced.
In addition, if the opening of the washbasin is only 7 or less than 7 or 8 cm from the edge, it needs to be reinforced with reinforcement. Even if this distance is exceeded, the reinforcement must be reinforced on the back if requested by the customer. After the inspection, if the customer has requirements to do protective waterproof treatment, etc., can be protected.

- Packaging
When packing, the product is packaged according to customer requirements or stone quality, and the blunt side is opposite to the blunt side, and the soft diaphragm to prevent scratches is sandwiched between the smooth surfaces. As for some stones that are afraid of scratches, like the general darker stones, such as Shanxi black, in order to prevent scratches from affecting the visual view, the coating treatment will be carried out.
The countertop should be placed vertically, so that the stone is stressed vertically, and should not be placed horizontally. It is best to pack all the countertops into a single piece and not loosen them.
Finally, it's done, and the countertop is ready to be shipped.
Stone Countertop Edging
If you look at the best quality and aesthetics, the best thickness of the countertop is 3 cm, but the price is not much more expensive than 2 cm, but it is also much more beautiful than 2 cm. You can also use a 2 cm countertop with 2 cm edges, so that you will have a 4 cm edge. But there will be slight traces of seams.
(1)Straight edges
It's great style for any kitchen or bathroom. Particularly suitable for a modern look


(2)The 1/4 rounded edge
It is a simple form factor that is perfect for kitchens and bathrooms. Its slight curves maximize the visual thickness of the countertop. This edge is suitable for both traditional and modern designs


(3)The 1/4 beveled edges
It accentuates the thickness of the kitchen or bathroom countertop. This edge is a great option for those who want to add shape to their countertops but don't want rounded edges


(4)1/4 Rounded Edge
The 1/4 rounded edge has a slight curve on both the upper and lower parts of the countertop


(5)semi-rounded edges
The semi-rounded edgeshave a slight curve on the upper surface of the countertop, with a straight bottom


(6)Semi-beveled edges
Semi-beveled edges are an excellent way to add a bit of design to your countertop while maintaining a straight line and overall look. The semi-bevel is ideal for allowing water to flow to the table without damaging the cabinets underneath


(7)Bull nose edge
The bull nose edge is perfect for a traditional kitchen or bathroom. This edge is a timeless classic that gives your countertops a very fluid look by making it look thinner


(8)semi-circular edge
The curve of the edge of the semi-circular edge extends more backward than the other rounded edges, with a flat bottom. The smooth shape directly removes any spills from the cabinet


(9)beveled edges
The beveled edges are beautiful, crisp and have strong angles. It provides a solid look to any countertop and is especially suitable for kitchen use. The bottom of the countertop has the same 45-degree angle as the top


(10)Hypotenuse
Hypotenuse. The elongated ramp will protect water and other liquids from damaging the cabinets below. The beveled edges are a stylish choice for kitchen countertops


(11) S-shaped curve Ed ge
This is the most popular edge profile for natural stone countertops. The edges feature a complex S-shaped curve, providing the perfect look for a traditional kitchen.


(12)French Edge
The French Edge is perfect for kitchen granite and marble countertops


(13)Edge with small bevel with a rounded bottom
The edge has a small bevel with a rounded bottom. Provides the appearance of an extended edge without taking up more space.


(14)Edges have a crescent-shaped curve, and a 90-degree angle
The edges have a crescent-shaped curve, and a 90-degree angle is connected to a rounded bottom. The result is a classic, delicate edge shape with a very modern feel


(15)
The bottom edge is rounded throughout, making it great whether it's a kitchen countertop or a bathroom basin. This edge can make the countertop look very complete while still looking good


(16)Semi-curved edge
The semi-curved edge styling is a simple but stylish look that fits into any countertop. The small crescent curve provides a unique visual sensation


(17)Waterfall-like edge
The waterfall-like edging shape has multiple rounded edges. The waterfall edge will give the countertop a thick and elegant look, perfect for luxury kitchens. But your countertops need to be cleaned daily to avoid accumulating dust in the creases


(18)Double bullnose Edge
The double bullnose rim combines two rounded and rounded edges to create an appearance reminiscent of flowing water. This design please make sure that your cabinets are kept dry and the countertops will look fantastic


(19)Elegant silhouette Edge
It is a unique edge shape with a crescent shape, with a modern look and elegant silhouette, ideal for classical kitchens. This edge works well and accentuates the beauty of the countertop


(20)Rounded bottom beveled edge
The beveled edge is a gently beveled shape with a rounded bottom. This rim is a fantastic choice for kitchen islands, with its slender tapered shape providing a stylish rim profile


(21)Elegant shape Edge
The edge moulding, which resembles a stair step, is a modern and elegant shape with a curved undercut lip that will enhance the visual appeal of counters and cabinets. This edge is suitable for both traditional and modern design schemes


(22)
It's a bold and chic edge shape that goes well with contemporary design solutions


(23)S-shaped design Edge
Combined with the S-shaped design of the duck beak, this gorgeous edge profile will accentuate the beauty of your countertop. And it complements the traditional kitchen design scheme


(24)duck beak Edge
The thinnest visual profile amplifies the beauty of the traditional duck's beak. This edge has a sleek and graceful curve that goes well with both modern and traditional design schemes


(25)bay shape
The bay shape, combined with the shape of the cow's nose, provides a decorative and luxurious aesthetic to traditional kitchens, especially on the middle island. This complex edge may be cumbersome to process


(26)crescent edge
The crescent edge is a soft, curved silhouette that mimics the traditional bull's nose edge, but with a smaller arc, adding a slightly sharper aesthetic. This styling is simple and seductive, suitable for modern style design schemes


(27)natural face edge
The natural face edge is one of the shapes that is hand-finished, which is more natural and rustic. The unique creation of this edge makes the countertop look very special


(28)thickened bullnose edge
The thickened bullnose edge gives the feel of a thicker countertop and adds a rounded edge to the base of the original rounded edge. This increases thickness and smoothness, revealing the full curve of the countertop


(29)thickened quarter-round edge
The thickened quarter-round edge gives the impression of a rounded profile at the top and a straight edge at the bottom of the countertop. It is a simple and smooth edge design for kitchen or bathroom countertops.


(30)S-shape combines straight Edge
The S-shape combines straight most popular edges to add a thicker dimension to your countertop. This edge is ideal for a traditional kitchen setup.


(31)semi-beveled combined Edge
The modern design of the semi-beveled surface combined with the straight edge gives the illusion of a thicker countertop. This is a good choice for kitchen countertops that require a simple design with a full look.


(32)Mitered edges
Mitered edges are a commonly used countertop edge shape and are often used for rectangular countertops that are joined at a 45-degree angle to create a pronounced edge. Miter edges create a streamlined effect, which is ideal for modern kitchen design.


(33)Double-layered semi-rounded edges
The double-layered semi-rounded edges are stacked to reveal the thick edge profile, making it the ideal and unique countertop look.


(34)1/4 semi-rounded edge is stacked on a semi-rounded edge
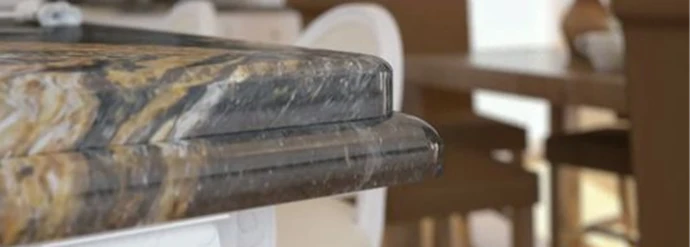
The 1/4 semi-rounded edge is stacked on a semi-rounded edge and an extra half-inch cow nose edge is added at the bottom to create a thick look that is ideal for a traditional kitchen countertop effect.

(35)Curved and semi-circular edge knots
Curved and semi-circular edge knots are a combination of two popular edge shapes. The elegantly curved edge sits on a half-inch rounded head profile, giving the kitchen countertop a chunky and stylish look.


(36)
It's a rounded style that combines the classic S-shaped curve on a full cow nose edge, with a thick and attractive edge shape that is a great choice for kitchen countertops, especially the island.


(37)
This rim combines two classic duckbill-like shapes, making it ideal for unique traditional kitchen countertops.


(38)stacked edges
The stacked edges, 1/4 rounded edges combined with a very classic curved shape to create a thickened look that is sure to be an eye-catching focal point. The curved edge is extended by adding an additional 1/4 rounded edge, showing a unique style.


(39)overlay inlay edge
The overlay inlay edge is a unique combination of two straight edges, with the lower half inserted from the upper half. The stacked inserts in the modern style design look great.


(40)Wire rope shape Edge
The wire rope shape is a very unique design that mimics the look of a braided braid. More to match with rustic design schemes.


